How to
Save your colorization work
When you colorize a photo in CODIJY, you can save your current work to a CODIJY document.
Creating CODIJY documents is important because this way you:
- save used palettes, masks etc. with the original image
- let the program auto-save your work on the given image
In this article, we discuss:
- the way CODIJY documents help save your work
- creating and saving CODIJY documents
- managing autosave function in CODIJY
Table of Contents
Let’s start with what information the CODIJY document stores.
What is CODIJY Document
CODIJY documents is the proprietary format of CODIJY software. They have the MGD extension.
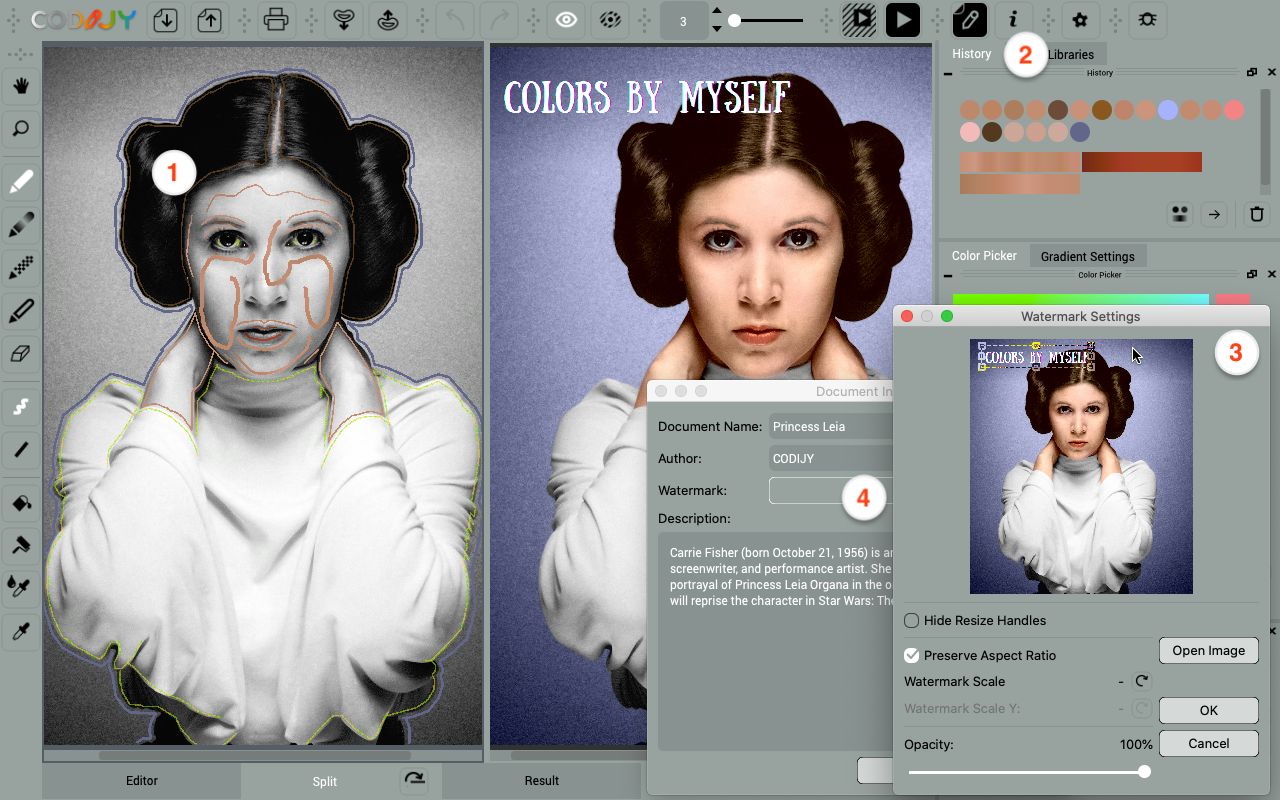
When you open a saved CODIJY document, you can see:
- Original image with the strokes (masks) applied
- History of colors that was used for the image
- Colorist’s watermarks
- Information describing the image the the colorist
Besides saving your work in progress, the CODIJY documents can be used to:
- refreshing or fixing the colors of your past works
- generating watermark-free results after software registration
- sharing your work with fellow-colorists should you need help
- accessing and exporting (Pro) colors used
We also use CODIJY documents to give you example of colorizations.
Save file as CODIJY Document
To create a new document, call the Save Document dialog.
Save new images to documents before you get down to their colorization, to avoid loosing your work!
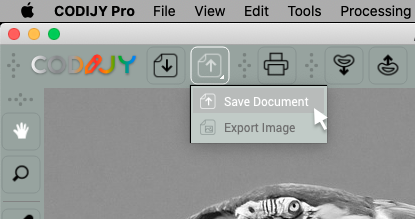
You can call the Save Document dialog box from the main window:
Option 1. Click Save icon
Option 2. Select File -> Save Document
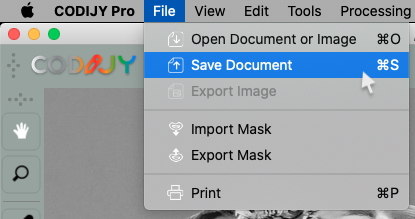
Or, use the following keyboard shortcut:
Press Ctrl S (Windows) /⌘ S (Mac)
Next, name the document and save the file in the desired location.
Manage the Autosave function interval
After you create a CODIJY document, the program starts automatically saving all made changes at specified intervals. This protects your work from accidental loss.
The Autosave function may slow down the program performance!
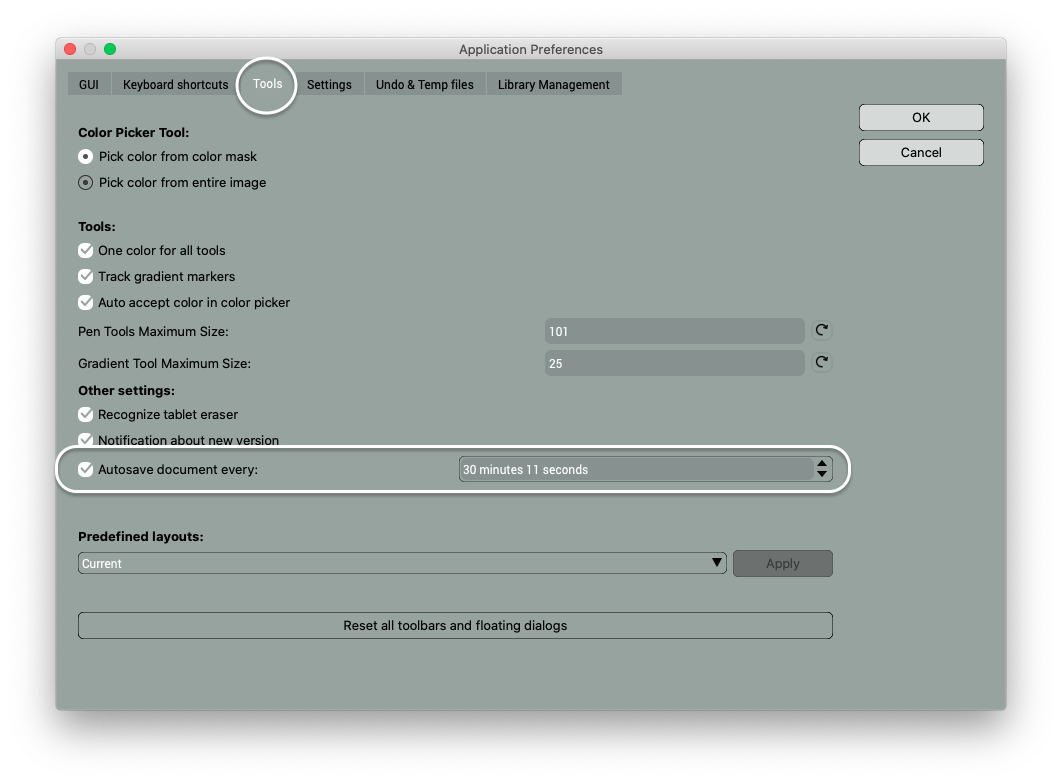
If the program starts to slow down, increase the auto-save intervals:
- Call the Preferences

- Open the Tools tab.
- Set a longer time period in the Autosave Document every:
Extras: Locate MGD documents on your disk
Open the saved CODIJY documents
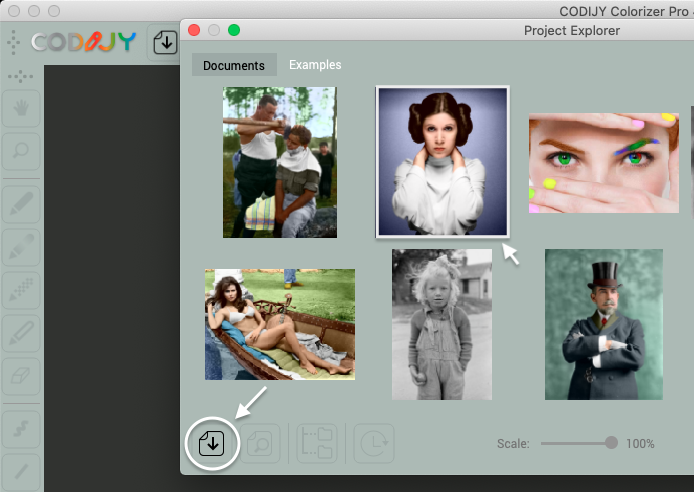
You can quickly locate and open any saved CODIJY document in the Project Explorer – the built-in navigator for MGD files.
Project Explorer opens on the program's startup.
If you need to call Project Explorer without restarting application:
Click the Project Explorer icon ![]() on toolbar!
on toolbar!
Project Explorer displays CODIJY documents as thumbnail previews. To access the recent document:
Step 1. Open Documents (the files appear chronologically)
Step 2. Click on a corresponding thumbnail
To locate an older document, switch to folder view
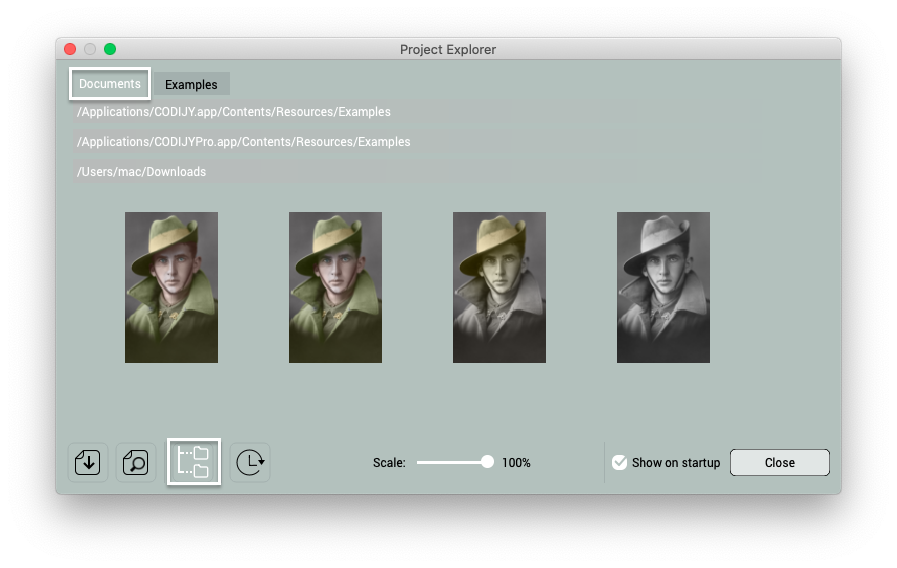
Also, you can run a search or sort MGD files by creation date using the icons at the bottom of the dialog box.
Access example CODIJY documents
CODIJY programs are packed with a few examples of colorized images that allow you to check the masks, refer to used colors etc.
You can open examples from the Example tab in Project Explorer.
