How to
Create & Edit Libraries
Color Libraries make color selection in CODIJY easier and faster. However, their set of colors is not able to meet all creative demands.
To help you customize the collection of preset colors to suit your needs, we’ve enhanced the Libraries feature with the ability to:
- create your own Color Libraries
- add colors and gradients to Libraries
- export used colors from a document to a new Library
- export and import custom Libraries
In this article, we explain how to add and manage your custom libraries in CODIJY Colorizer Pro.
Table of Contents
Creating New Libraries
Custom Libraries help tune the color selection process to your individual needs. For example, you can create libraries that:
- include shades from your preferred color schemes
- feature colors on topics not found in the standard pack
- bring hues for most frequent subjects into one palette
To build your own list of color Libraries, use one of these three easy options:
- Create an empty Library and fill it with colors.
- Export used colors from a document to a new Library.
- Import Libraries created and shared by other users.
1
Add a new Library from Color Libraries
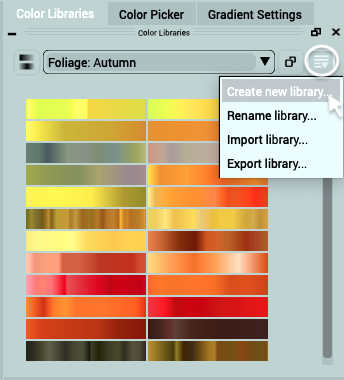
You can add a new Library using the menu in the Color Libraries panel:
Step 1. Go under the Color Libraries tab on the right sidebar
Step 2. Open the hamburger menu to the right from the selection box.
Step 3. Select Create new library …
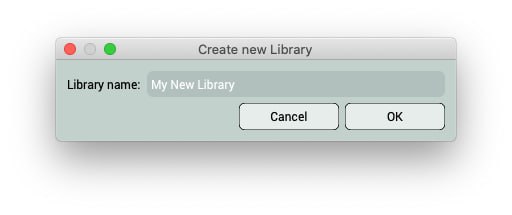
Name your library and click OK.
The New Library will appear in the list of Libraries.
2
Add a color or a gradient to your library
In Colorizer Pro, the color preview has an icon ![]() . It marks that the selected shade can be added to the custom Color Library. To add a color:
. It marks that the selected shade can be added to the custom Color Library. To add a color:
Step 1. Click on the color preview.
Step 2. Select the custom Library from the list.
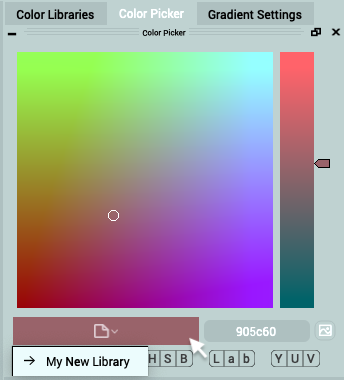
Now, open the Library and check if the color is there.
If you have not created any library yet, the program will offer you to create one!
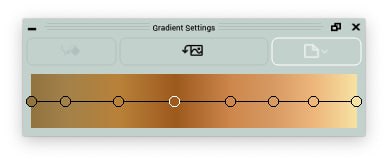
If you want to save a gradient, open Gradient Settings and click the Save Gradient button with the same icon
Export History to a library
You can export all colors used to colorize a particular image to the new Library in just a few clicks. This comes useful, when you:
- have colorized the first image from a set of e.g. movie stills,
- used a unique set of colors for a historical image,
- came up with a great color scheme.
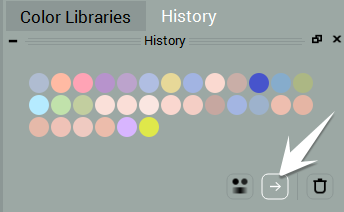
To do this, use the Export History command in the document History.
Step 1. Open the CODIJY Document
Step 2. Open its History on the right sidebar
Step 3. Click the Export History button, name the library and click OK.
Export and Import custom Libraries
At some point you may need to:
- share your libraries with fellow colorists,
- transfer your collection of colors to a new computer.
Colorizer Pro allows you to export any custom Library to a file from the hamburger menu in Color Libraries. Such files have a CML extension.
CML format is cross-platform and let you share and use your Libraries on all supported platforms.
You can import CML files of your own or third party Libraries from the Libraries panel as well.
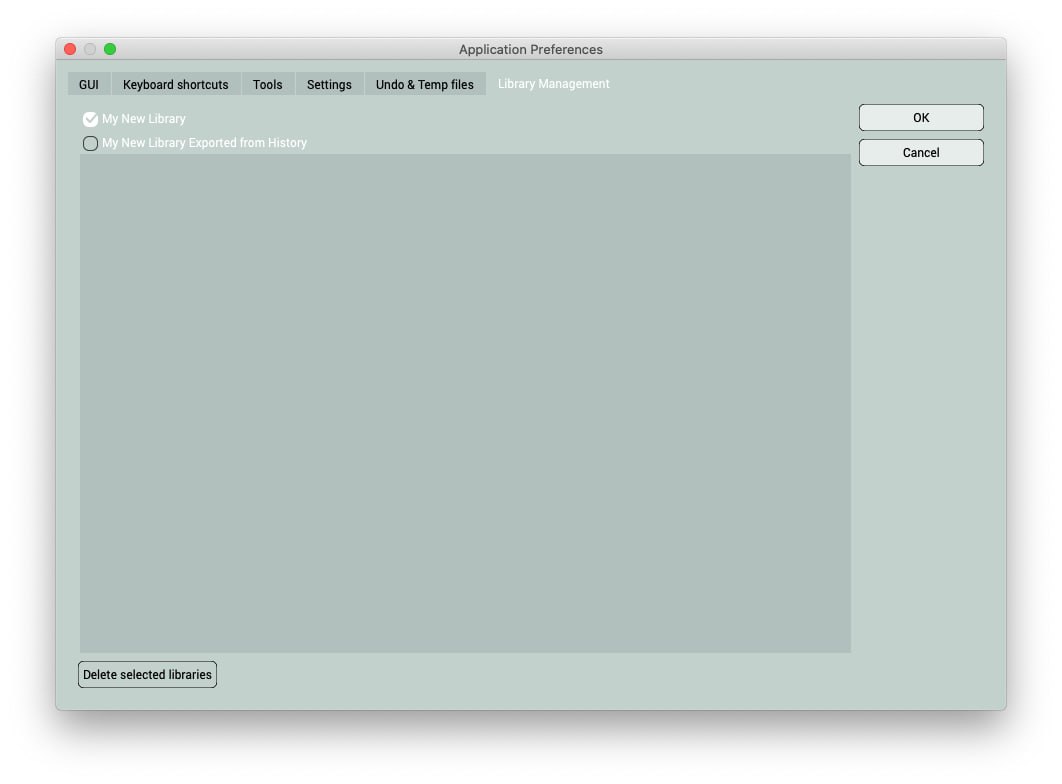
Delete custom libraries
If you no longer need this or that custom Library:
Step 1. Open Library Management tab in Preferences ![]() .
.
Step 2. Tick the Library check box.
Step 3. Click the Delete selected library button and OK.
