Masterclass

Little girl

Author

Vera Zvereva, Colorizer, CODIJY
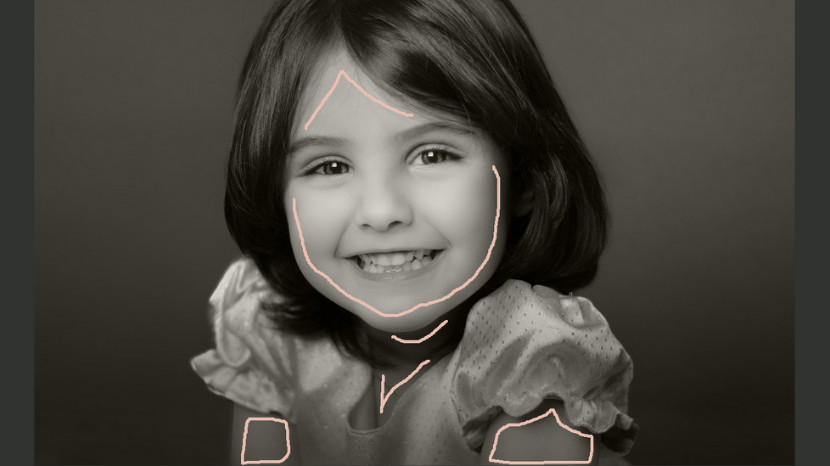
Learn quick and simple technique of colorizing portraits. 

Contents

this tutorial requires

Introduction

Breathing in new life into portraits is one of the most emotional colorization tasks. CODIJY turns portrait colorization into a pleasurable creative process.


In this lesson you will:

  • learn basic tactics & essential secretes of the realistic portrait colorization in CODIJY
  • learn to work with Color Libraries related to appearance
  • make first steps in using Gradient feature

NOTE: The example was created using new set of Color Libraries added to CODIJY Colorizer Pro, version 3.7. If you are using an older version or CODIJY Recoloring please:

  • use provided HEX colors instead
  • pick your own colors using libraries, available in CODIJY Recoloring

Get ready

Step 1. Save the below grayscale image to your drive.
Step 2. Launch CODIJY and open the image (Ctrl + O (Win)/ Cmd + O (Mac)).
Step 2. Save the image to CODIJY Document (Ctrl + S (Win)/ Cmd + S(Mac)).

NOTE: Starting from version 3.7.5, CODIJY will automatically save your work in progress. You can adjust Autosave intervals in Preferences – > Tools.

Apply skin tone

Enable Pen Tool Pen tool in CODIJY Colorizer Pro and switch to the Freehand drawing  . In this lesson, you will work with the curved masks.

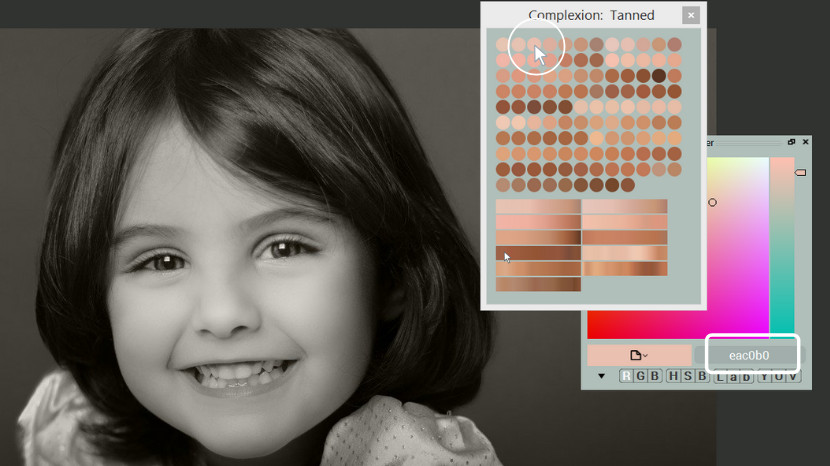
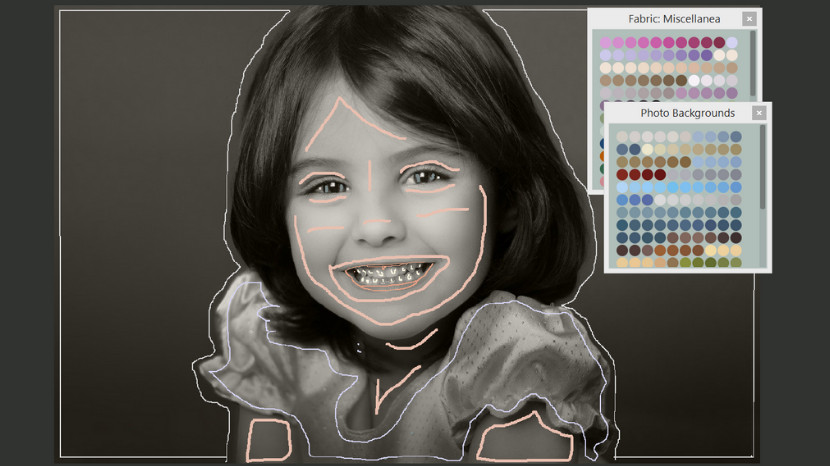
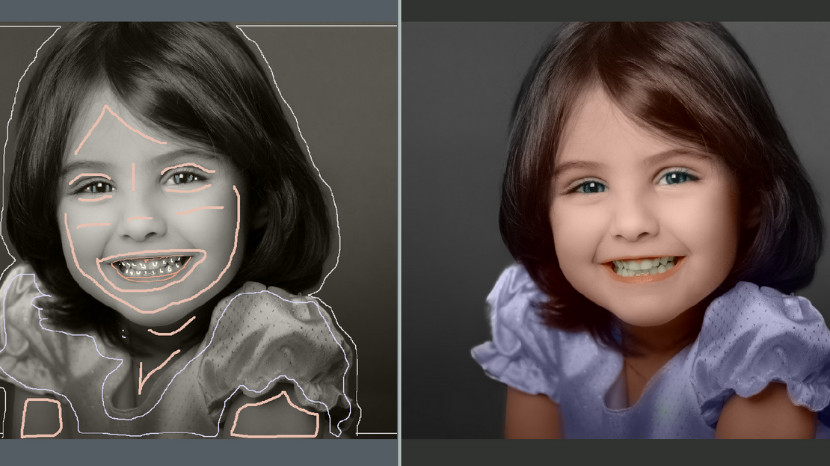
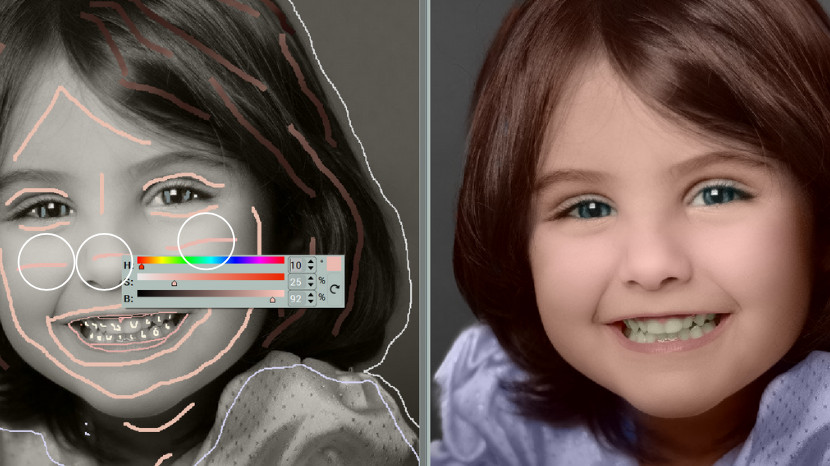
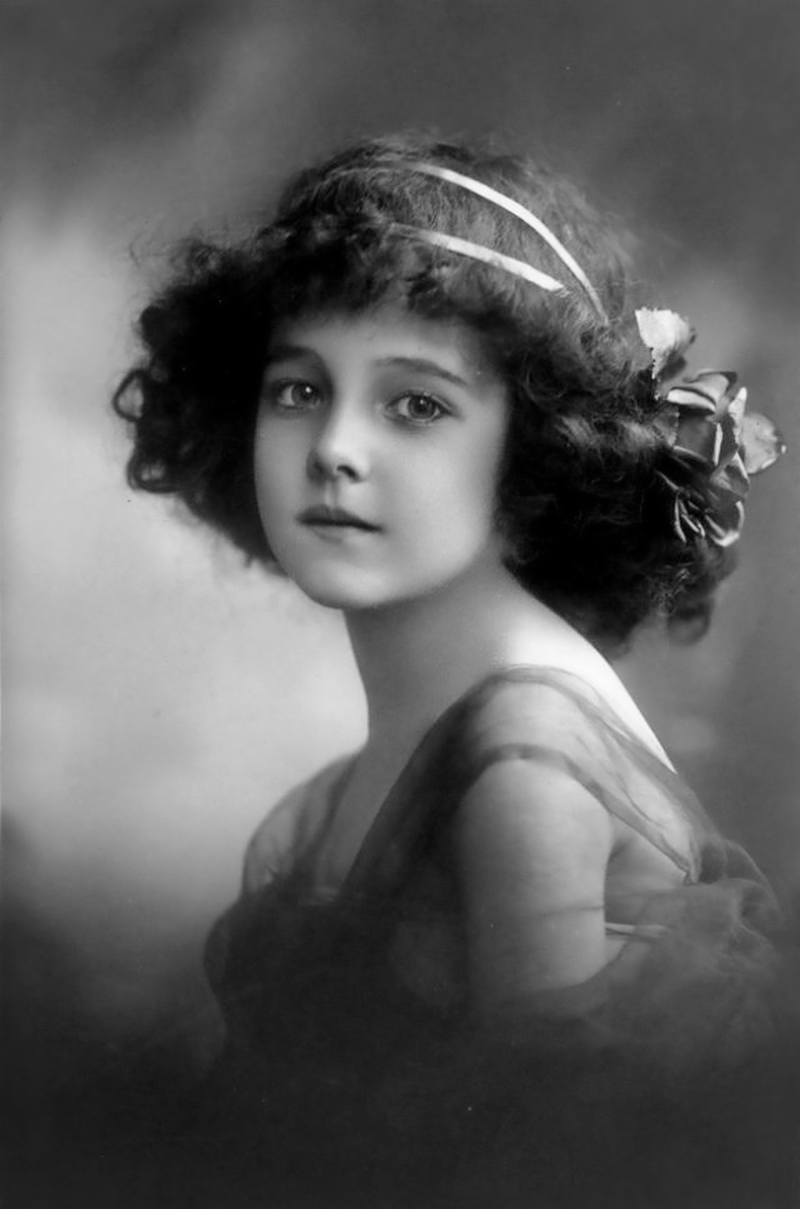
Pick the highlighted color (#eac0b0) from the Complexion: Tanned library. The slightly tanned skin tone will look perfectly with the girl’s chestnut hair.

Tip: If you cannot find the suggested color, copy its HEX value and paste it into the HEX field if the Color Picker dialog.

Add masks to the face, neck and hands. 


Remember: Draw masks close to the area boundaries, without stepping on them.

Next, outline the eyes and the mouth with the same tone. These contours will prevent the colors from these areas from spilling over the facial zone. In the end, add strokes over the cheeks and the nose. Later we will use them to add pink tone to the cheeks.

Colorize the eyes iris

To colorize the eyes, Open the Eyes: Iris library. Pick the first bluish shade of gray (#7b898a) to obtain the natural blue tone of the eyes.

Tip: Use the Navigator to zoom and navigate images while you are drawing.

Colorize the eye whites

Please note that what we regularly perceive as the white tone is never the monochrome white in the portraits. Normally, you are looking at the tone of the beige or light pink, or the combination of tones. The Eye Whites library help pick the best matching natural shade for your portrait. Pick the beige tone (#d5cec4). add a few dots. 

Realistic tones of the smile

Step 1. Decrease the brush size to 1 px for the upper lip.

Step 2. Pick the coral tone (#ed8375) from the Lips: Children library.

Step 3. Draw a mask over the upper lip. Make an additional stroke over the upper gum. Then, increase the brush size to 2-3 px. Draw the next mask over the lower lip.

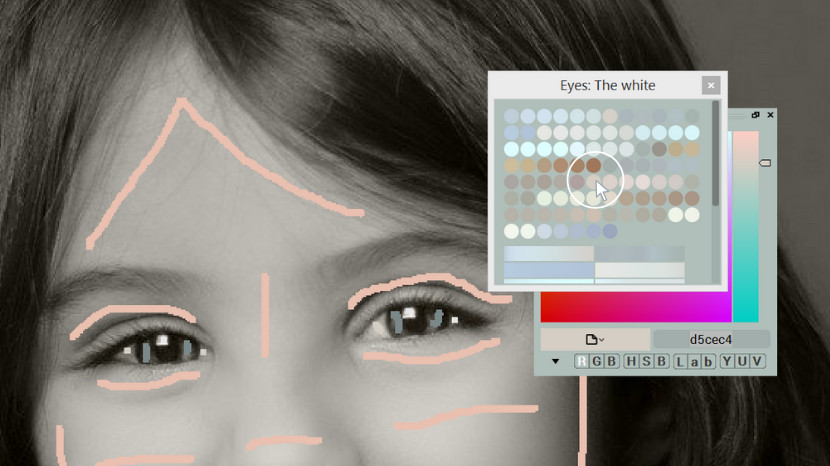
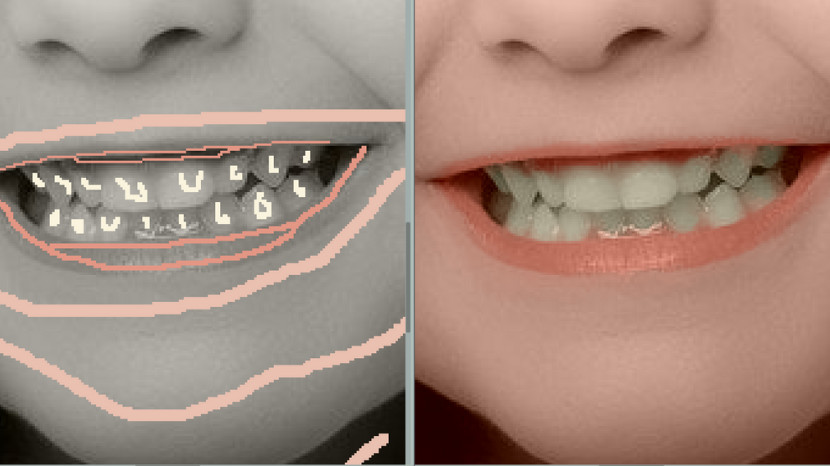
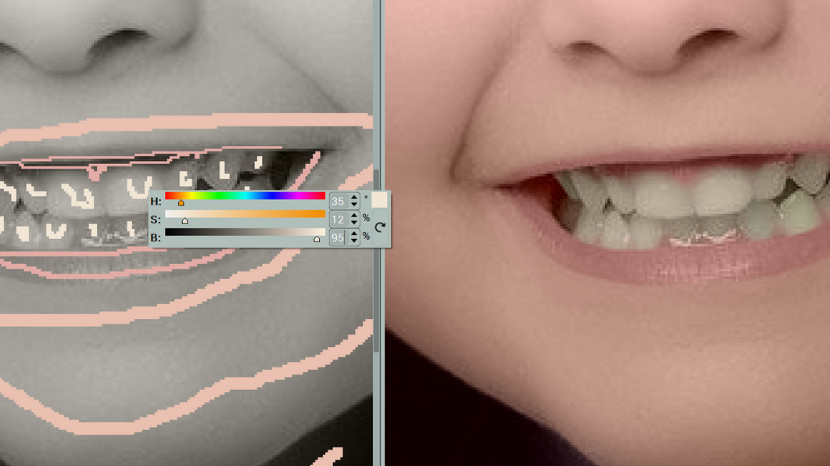
Now pick the shade of yellow (#fbf5df) from the Teeth library. As with eyes, the monochrome white or blue tone will return the the unnatural result so we recommend picking the tone from the library.

Note that you can either add masks to each tooth or colorize them at once by drawing the single line or contour. The former technique allows you adjusting the color of each one individually, as the colors of the teeth may vary.

Generate preview 

Check the boundaries. At times CODIJY may fail to recognize blurred borders. The upper gum was not filled correctly, because the border there is not quite distinct.

We will add one more stroke to define the area boundary precisely.

Step 1. Pick the “lip” color from the History.

Step 2. Add a small stroke above the upper teeth. Draw the mask closer to the boundary so that the program could follow it precisely.

The Dress & the background

Pick the colors you like from the the Fabrics: Miscellanea library and the Photo Backgrounds Libraries. Switch to the Line Mode (L)  to outline the large areas quicker.

The preview looks fabulous. Let’s finish the masks!

Colorizing the hair

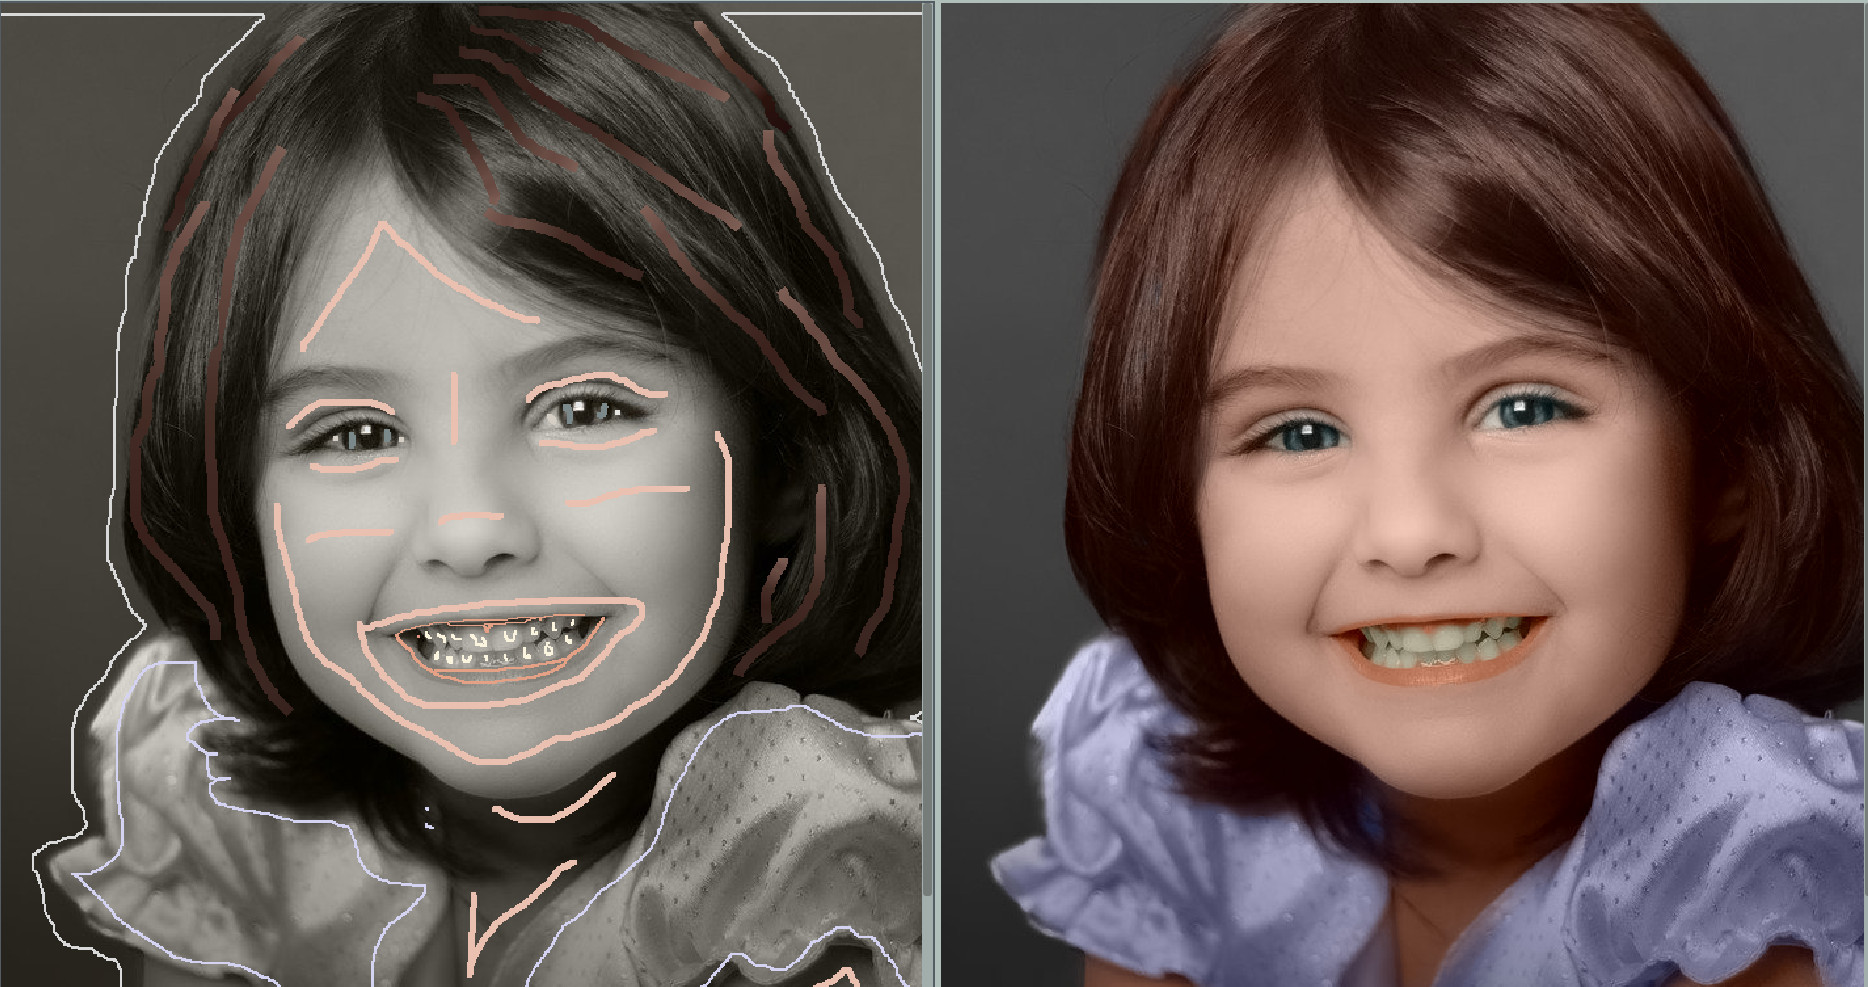
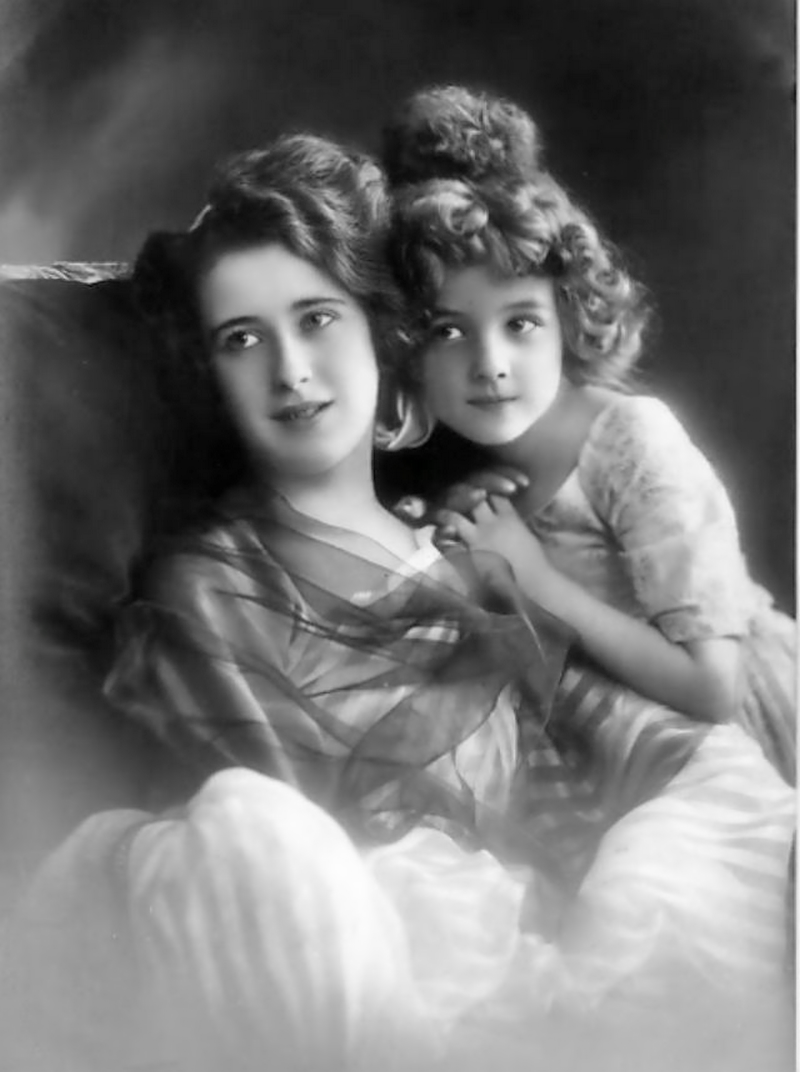
To add natural tone to the hair we will make use of the gradients– the multicolor masks that allow recreating transitions of several colors with a single stroke.

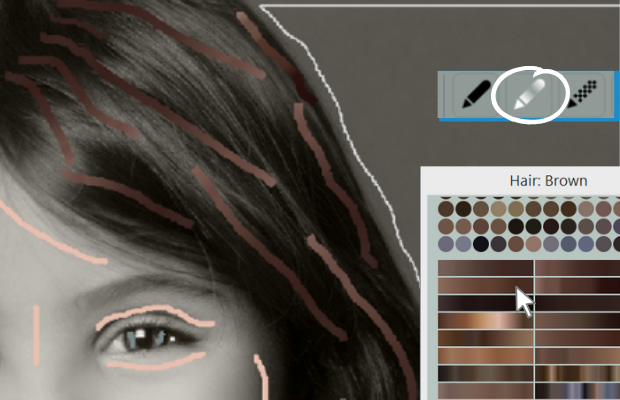
Step 1. Switch to the Gradient Pen 
Step 2. Open the Hair: Brown Library and scroll down to gradients.
Step 3. Pick a Gradient.When you draw the gradient mask try to match the light and dark tones of the gradient with the related tones of the hair by stretching the gradient mask.

NOTE: The ready gradients were captured from the color images and present the color diversity of the live colors. The light and dark tones in the gradient are generally different hues and will therefore add realistic look to the object.

Now, generate the result.

Correcting the mismatchging tones

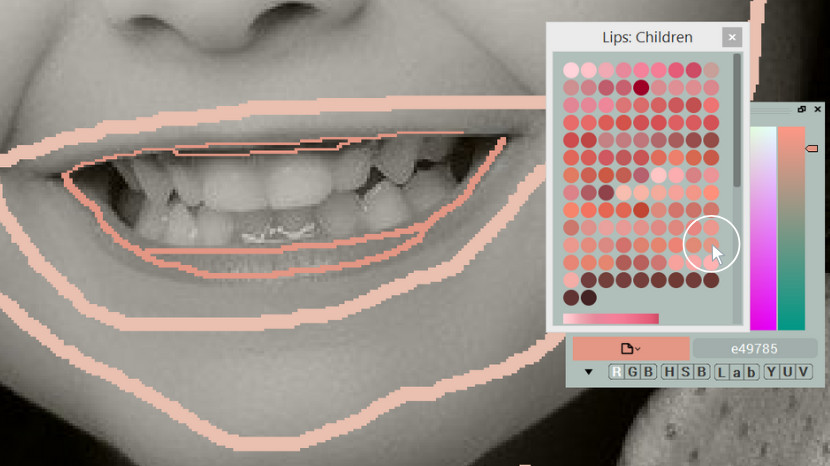
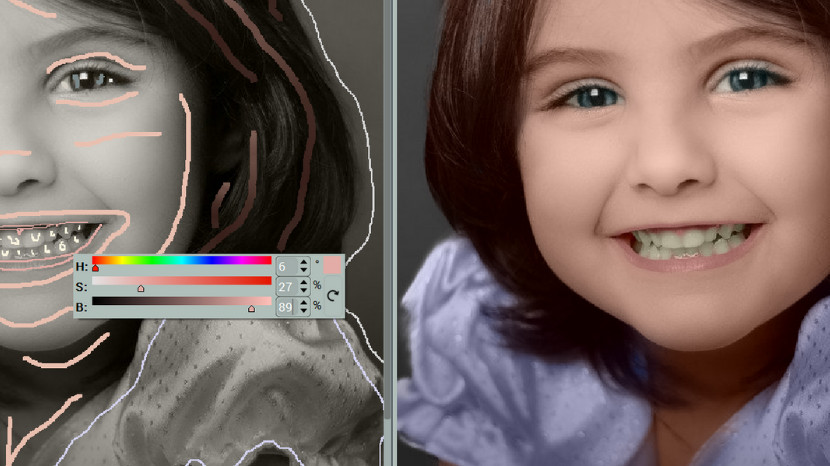
After we are done with the first color draft, we can spot that the lips look excessively saturated and therefore unnatural. To fix this, we will adjust the hue and decrease the saturation with the help of the HSB Repaint tool.

Step 1. Enable HSB Repaint under the drawing tools and click the mask. 

Step 2. Decrease the mask Hue and Saturation to 6 and 27 respectively.

After we’ve made adjustment to the lips, the teeth started looking too much greenish against the new tone. Edit their mask using the HSB Repaint.

Then use the Color Picker tool and the Repaint Bucket to repaint the other masks.

Now let’s add the final touch. Change the shade of the masks over the cheeks and the nose towards pale pink. You can use the suggested HSB values (H 10 / S 25/ B 92).

Could you tell that this image has been colorized?

Save your work and Export the Image

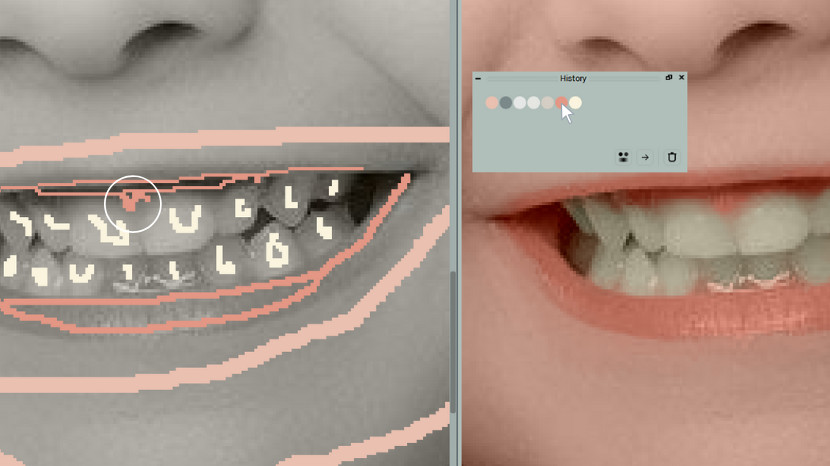
  1. Save your document (Ctrl + S (Win)/ Cmd + S(Mac)) .
  2. Export image preview to JPEG, PNG or other formats. Long-press Save  and select Export Image from the drop-down list.
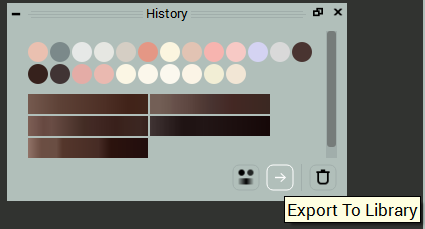
  3. Export Color History to a new Library and save these colors for future reference!

Photos for Practice

Click and save the photo to practice portrait colorization.  

Colorizer Pro

15-day trial

Try the magic art of photo colorization with CODIJY Colorizer Pro! Explore all its features for 15 days absolutely risk-free! Create superb colorizations and save them to CODIJY documents (*mgd files) without limitations. 

Explore all its features for 15 days absolutely risk-free! 

Available for Windows & Mac. Get the download links to your mailbox!   

This is one time email. 

(*) Watermarks will disappear from the colorized preview, after you open saved CODIJY documents in the registered version.